 Tayyab Ali
I was staring at a renewal notice for my old Hostinger plan — Rs. 2,199 per month, auto-renewing in August 2026. I had been building tabaix.com for months, and the idea of paying that rate for another year felt wrong when I knew Hostinger was offering new accounts at a fraction of the price.
So I did what any sensible person does: I opened a brand new Hostinger account, grabbed a 4-year Business Web Hosting plan for PKR 34,516.80, and saved PKR 75,835 off the standard price. Then I had to move my entire website — files, database, WordPress settings, everything — from the old account to the new one without breaking a single page.
This is exactly how I did it, step by step, with the mistakes included so you do not make them.
Why I Switched Accounts Instead of Renewing
Hostinger’s promotional pricing only applies to new accounts. When you renew an existing plan, you pay the standard rate — which in my case was Rs. 26,388 per year. A brand new 4-year Business plan on a fresh account cost PKR 34,516.80 total. That is four full years for less than one and a half years at the renewal price.
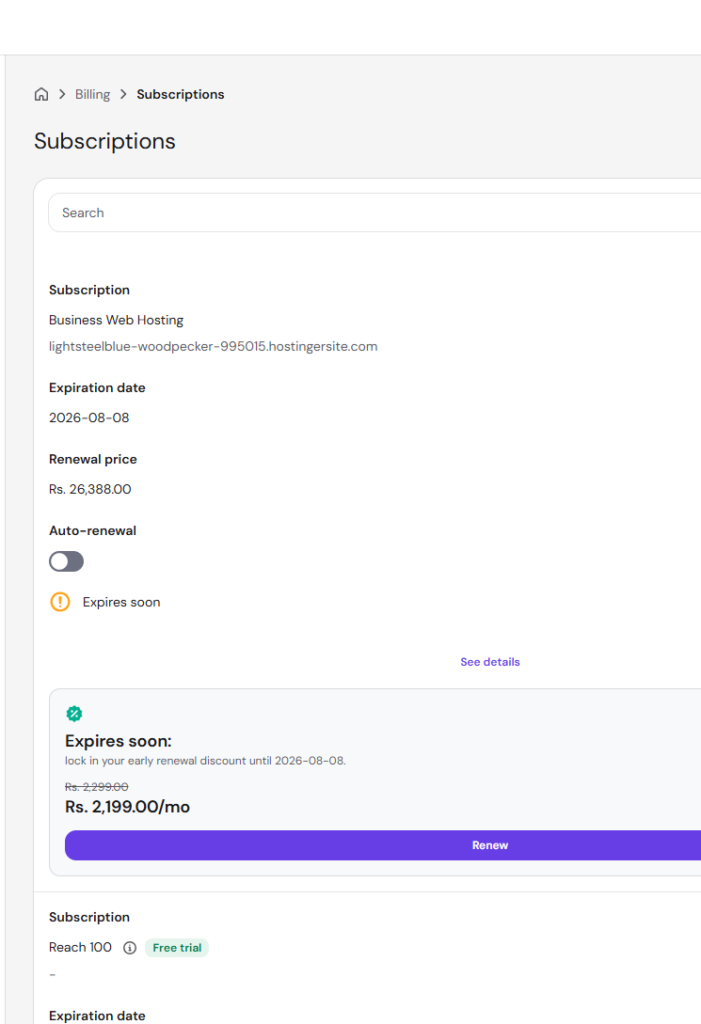
My old Business Web Hosting plan showing expiry on 2026-08-08 and the Rs. 26,388 renewal offer — the number that made me open a new account instead.
The maths were not complicated. The only question was whether moving the site would be painful enough to make the saving not worth it. It was not painful at all — once I understood the correct order of steps.
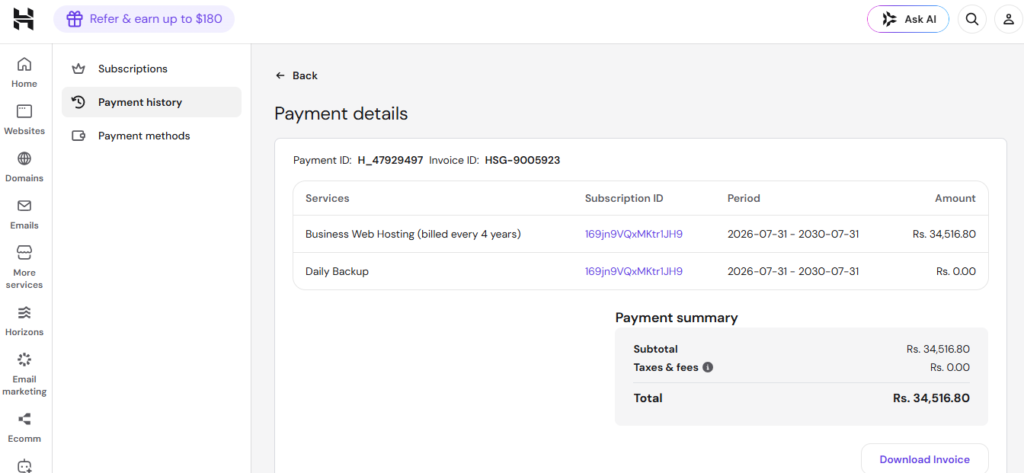
The total I paid for the new 4-year plan: PKR 34,516.80 against a standard price of PKR 110,352. Daily Backup was included at no extra charge.
The Right Order — Why Domain Goes First
Most tutorials tell you to back up your files first. I transferred my domain first, and I recommend you do the same. Here is why: once the domain is sitting inside your new account, you can attach it directly to your new hosting slot before you touch a single file. Everything else then connects to that domain cleanly.
If you move files first and domain second, you end up in a situation where your new hosting slot has a temporary domain and you have to update URLs inside WordPress afterward. Save yourself that step.
The correct order:
- Transfer domain to new Hostinger account
- Create empty hosting slot in new account and attach the domain
- Download file and database backups from old account
- Upload and extract files in new account
- Create new database and import backup
- Update wp-config.php with new database credentials
Step 1 — Transfer Your Domain to the New Account
Log into your old Hostinger account.
Go to Domains → Manage next to your domain name.
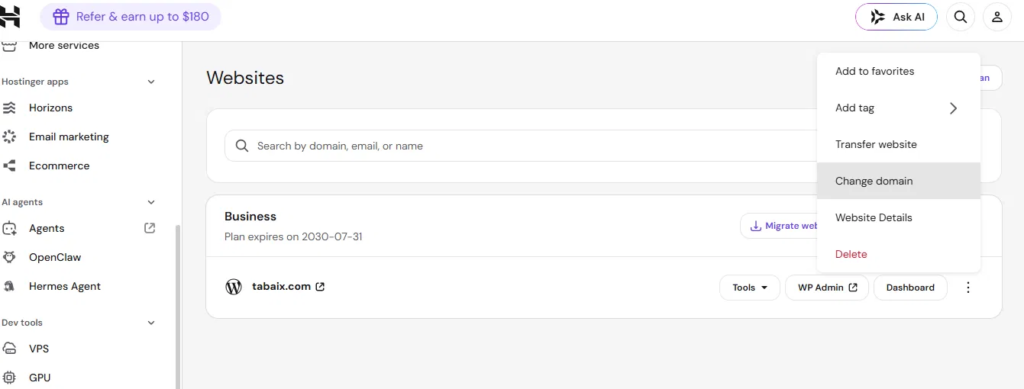
Look for Domain Ownership in the left sidebar. Click it, then select Move to another Hostinger account. Enter the email address of your new Hostinger account and confirm.
Check the inbox of your new account — Hostinger sends a confirmation email. Click the link inside it. Your domain is now under the new account.
This takes about two minutes and there is no downtime. Your site stays live on the old hosting throughout this process — moving domain ownership between Hostinger profiles does not change your DNS or nameservers.
Step 2 — Set Up an Empty Slot in the New Account
Log into your new Hostinger account.
Go to Websites → Add Website (or “Create or migrate a website”).
Choose Create a new website → Skip, create an empty website.
When it asks for a domain, select your domain — the one you just transferred. Attach it to this new hosting slot.
tabaix.com successfully attached to the new Business Hosting account — this is what the Websites page looks like once the domain transfer and slot setup are complete.
Hostinger will create the slot and automatically populate the public_html folder with a few default placeholder files. Do not touch these yet — you will clear them in Step 4.
Step 3 — Download Your Backups from the Old Account
Go back to your old Hostinger account while it is still active.
Navigate to Websites → Manage → Files → Backups.
Download two things:
- File Backup — a .zip archive of your entire public_html folder
- Database Backup — your .sql or .sql.gz file containing all your WordPress data (posts, settings, users, everything)
Keep both files somewhere safe on your computer. Do not skip the database backup — your files alone are useless without it. A WordPress site without its database is just folders of PHP code with no content.
Step 4 — Clear public_html and Extract Your Files
This is the step most people get wrong. When Hostinger creates an empty site, it puts placeholder files inside public_html — usually default.php and sometimes index.html. If you extract your backup zip on top of these files, your homepage may continue showing the Hostinger welcome page instead of your site.
Delete everything inside public_html first.
In your new account: Websites → Manage → Files → File Manager → open public_html.
Select all existing files and folders inside public_html and delete them. Make sure you are deleting the contents of public_html, not the folder itself.
Then upload your .zip backup file into the now-empty public_html folder. Right-click the zip file and select Extract — extract directly into public_html, not into a subfolder. Once the extraction is complete, delete the .zip file to recover the disk space.
Step 5 — Create a New Database and Import Your Backup
Go to Databases → MySQL Databases (or Databases → Management) in your new hPanel.
Create a new database. Write down three things the moment you create them — you will need all three in the next step:
- Database name
- Database username
- Database password
Click Enter phpMyAdmin next to your newly created database.
Click the Import tab at the top. Click Choose File and select your .sql or .sql.gz backup file. Scroll to the bottom and click Go.
The import will run — for a typical WordPress blog it takes 10 to 60 seconds. When you see the green success message, your entire WordPress database is now inside the new account.
Step 6 — Update wp-config.php
Your site files are now in the right place. Your database is imported. But they do not know about each other yet — the WordPress configuration file still has your old database credentials in it.
In File Manager, navigate to public_html and open wp-config.php. Find these three lines:
define('DB_NAME', 'old_database_name');
define('DB_USER', 'old_database_user');
define('DB_PASSWORD', 'old_database_password');
Replace them with the new credentials you created in Step 5:
define('DB_NAME', 'your_new_db_name');
define('DB_USER', 'your_new_db_user');
define('DB_PASSWORD', 'your_new_db_password');
Save the file. Your site is now live on the new account.
What About WordPress Admin Login and Email?
Your WordPress admin username and password do not change. They live inside your database — which you imported intact. Log in exactly as before.
However, password reset emails often fail immediately after a migration because your new server’s email routing is not configured yet. If you need to reset your admin password before email is working, go to phpMyAdmin → wp_users table, find your username, click Edit, change the user_pass field using MD5 function, and save. This updates your password directly in the database.
The Cost Breakdown — What I Actually Paid
| Item | Amount |
|---|---|
| Standard 4-year price | PKR 110,352.00 |
| Discount applied | PKR 75,835.20 |
| Amount I paid | PKR 34,516.80 |
| Daily Backup (4 years) | PKR 0.00 (included) |
| Plan period | Jul 31, 2026 → Jul 31, 2030 |
Renewing my old plan month-to-month would have cost Rs. 2,199 per month — Rs. 26,388 per year, Rs. 105,552 over four years. The new account plan for the same four years cost PKR 34,516.80. The saving is real.
If you are setting up a new Hostinger account, you can use my referral link to get an additional discount on top of whatever sale is currently running:
👉 Get Hostinger discount — Referral code: Tabaix (affiliate link)
Practical Tips Summary
Transfer domain before files: Moving the domain first lets you attach it cleanly to your new slot before touching anything else. This avoids URL update issues inside WordPress later.
Always download both backups: The file backup and the database backup are both required. Files without the database give you nothing; the database without the files gives you nothing.
Clear public_html before extracting: Hostinger’s default placeholder files will conflict with your real homepage if you do not delete them first. This is the most commonly missed step.
Write down database credentials the moment you create them: You will need the exact database name, username, and password in wp-config.php. Copy them somewhere before leaving the database creation screen.
Do not cancel the old account until the new site is confirmed working: Keep the old account active until you have checked every page, every image, and every form on the new site. DNS changes take 2 to 24 hours to propagate — the old account is your safety net during that window.
Password reset emails may not work immediately: Configure your new Hostinger account’s email settings or use phpMyAdmin to reset passwords directly if you get locked out during the transition.
FAQ
No. Hostinger’s File Manager and phpMyAdmin handle everything you need for free. The manual method described here — download backup, create new database, import, update wp-config.php — works for any WordPress site regardless of size.
Yes — Hostinger has an automated migration tool under Websites → Migrate Website in the new account. You enter your old site’s login details and Hostinger clones it. The manual method gives you more control and ensures nothing is skipped, which is why I chose it.
This means wp-config.php still has your old database credentials. Open it in File Manager, find the DB_NAME, DB_USER, and DB_PASSWORD lines, and replace them with the credentials from your new database created in Step 5. Save the file and refresh your browser.
No. Your admin password is stored in the database, which you imported intact. Log in with your existing credentials. If password reset emails are not working on the new server, you can update your password directly in phpMyAdmin under the wp_users table.
Hostinger’s deepest discounts apply to longer-term plans (2-year or 4-year) on new accounts. My 4-year Business Web Hosting plan cost PKR 34,516.80 against a standard price of PKR 110,352. Using a referral link at signup can stack an additional discount on top of whatever promotion is running: Hostinger discount — code Tabaix.
